Since I recently upgraded the case of my trusty Raspberry Pi to an Argon ONE (the last Pi case you'll ever need, really), I thought it's a good time to share the procedure of installing one of the best pieces of software I have ever used: namely Pi-hole. This little DNS server whacks most of the ads before the request even leaves your network, making internet browsing a much better experience. Great thing is, once put in place, it's set and forget. You will realize how much you love it when you surf the net without it 🤪
I like things organized and my Pi runs other things besides Pi-hole so I'll use Docker. Instructions are for Raspbian (Raspberry Pi OS), but should be similar on other OS's as Pi-hole is not exclusive to the Raspberry.
Get Docker
curl -fsSL https://get.docker.com -o get-docker.sh
sudo sh get-docker.sh
... and docker compose:
sudo mkdir -p /usr/local/lib/docker/cli-plugins
sudo curl -SL https://github.com/docker/compose/releases/download/v2.1.1/docker-compose-linux-armv7 -o /usr/local/lib/docker/cli-plugins/docker-compose
sudo chmod +x /usr/local/lib/docker/cli-plugins/docker-compose
Setting up Pi-hole
Create a directory for Pi-hole persistent files and edit the docker compose file:
mkdir -p ~/pihole/pihole ~/pihole/dnsmasq.d
cd ~/pihole
nano docker-compose.yml
Paste the following into docker-compose.yml
version: "3"

services:
  pihole:
    container_name: pihole
    image: pihole/pihole:2021.12
    restart: unless-stopped
    network_mode: host
    #ports:
      #- "53:53/tcp"
      #- "53:53/udp"
      #- "67:67/udp" #needed only if you want PiHole-DHCP
      #- "80:80/tcp"
    dns:
      - 127.0.0.1 #Sets your container's resolve settings to localhost - may fix resolution errors on container restart.
      - 1.1.1.1 #Sets a backup server of your choosing in case DNSMasq has problems starting
    environment:
      TZ: 'Europe/Athens'
      # Set to your server's LAN IP, used by web block modes and lighttpd bind address.
      #FTLCONF_REPLY_ADDR4: 'YOUR.SERVER.IP' #called ServerIP in the past
      ServerIP: YOUR.SERVER.IP # Will be deprecated
      WEBPASSWORD: '' #blank
      # to reset afterwards run docker exec -it pihole_container_name pihole -a -p
      PIHOLE_DNS_: '127.0.0.1#5053;127.0.0.1#5053'
    volumes:
      - './pihole/:/etc/pihole/'
      - './dnsmasq.d/:/etc/dnsmasq.d/'
A few explanations here - I choose to run the container in host network mode as it is easier in my setup. If you want to define required ports for bridge mode, I've left the ports in the config, just comment network_mode and uncomment the ports section. Regarding Pi-hole, version 2022.01 (latest as of now) was having problems with FTL on my Pi, so I use the 2021.12 version, but you can try latest.
In the environment section you should change:
TZ: Your timezoneServerIP: your hosting server's IP. Although the documentation states that ServerIP variable will be deprecated and you should useFTLCONF_REPLY_ADDR4, I couldn't get it to work with the new setting. Maybe in future versions.WEBPASSWORD: should be changed to whatever you like.PIHOLE_DNS_: is the upstream DNS that Pi-hole uses. These can be set up also in the web interface of Pi-hole later, so it's optional to specify them here. I always define two, because if not, it will auto-pick EvilEmpire for the second one and we don't want that. You may notice I point it to localhost port 5053, that's where cloudflared runs for DNS-over-HTTPS. More on that later.
Now you can fire up the Pi-hole container.
cd ~/pihole
sudo docker compose up -d
Finishing up
After you started the Pi-hole container, you must configure your DHCP server (or client) to point to Pi-hole's IP as DNS server. Then navigate to http://pi.hole/admin/ and you are greated by the Pi-hole login screen. Here, use your pass to log in and configure your ad-black-hole.
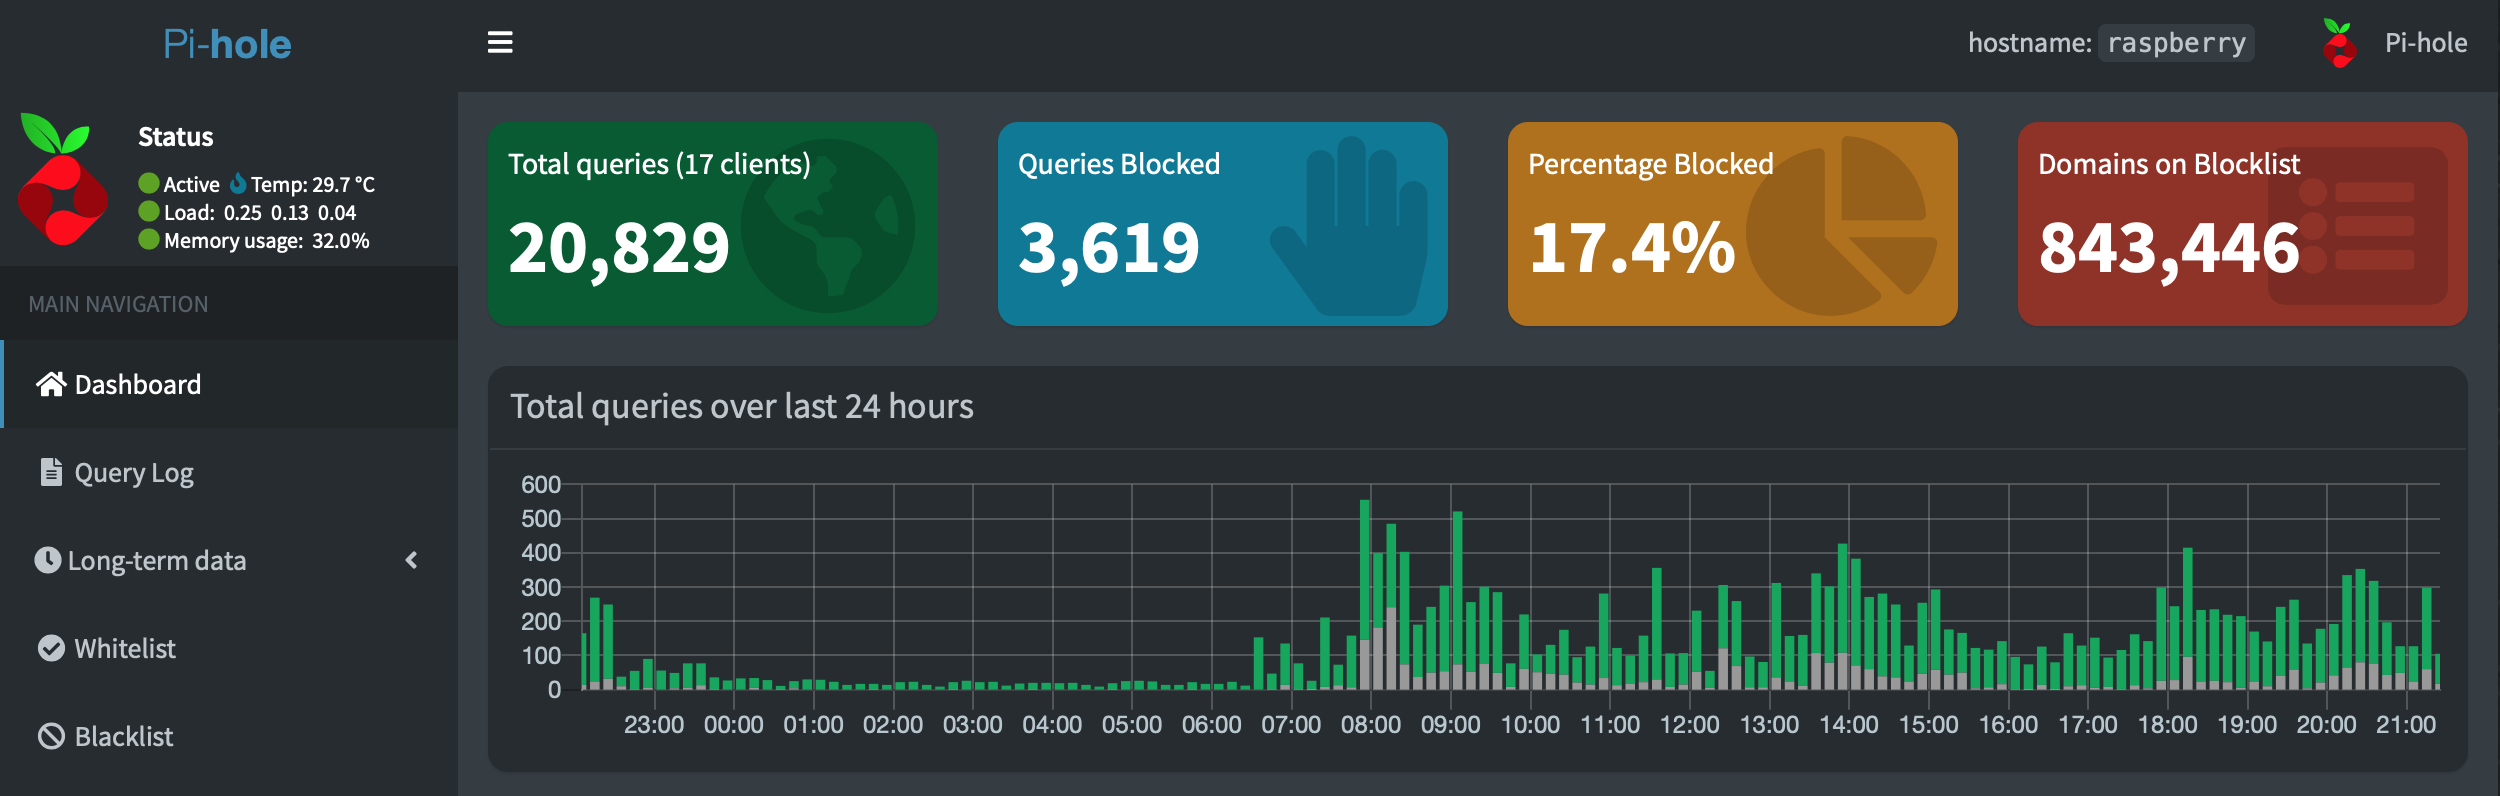
The first thing you should do, is check that FTL is running normally. You can do this by looking for the green Active status top-left of Pi-hole's web interface. Then configure your blocklists by clicking Group Management -> Adlists. The best collection of blacklists I found is on firebog.net. Check it out.
If you haven't configured your upstream DNS servers, go to Settings -> DNS. As you will see, there is a wide range of options to select from like Google, Cloudflare, Quad9 and so on.
Happy browsing! 😉
If you want DNS-over-HTTPS (DoH)
For this, we will need to configure cloudflared on our Pi so Pi-hole can use it as upstream DNS. There is a very good guide on how to do this in the Pi-hole documentation. Below the configuration for armhf 32-bit.
wget https://github.com/cloudflare/cloudflared/releases/latest/download/cloudflared-linux-arm
sudo cp ./cloudflared-linux-arm /usr/local/bin/cloudflared
sudo chmod +x /usr/local/bin/cloudflared
cloudflared -v
The last command above is to test the version of the daemon. If all is good, proceed with creating a cloudflared user to run the daemon and a configuration file.
sudo useradd -s /usr/sbin/nologin -r -M cloudflared
sudo nano /etc/default/cloudflared
This file contains the command-line options that get passed to cloudflared on startup. I have mine like this, comment/uncomment it to fit your needs. I know which line you will touch first 🤓.
# Commandline args for cloudflared

# Normal resolver
#CLOUDFLARED_OPTS=--port 5053 --upstream https://1.1.1.1/dns-query --upstream https://1.0.0.1/dns-query

# Malware off - 1.1.1.2/1.0.0.2
#CLOUDFLARED_OPTS=--port 5053 --upstream https://security.cloudflare-dns.com/dns-query

# Malware and pr0n off - 1.1.1.3/1.0.0.3
CLOUDFLARED_OPTS=--port 5053 --upstream https://family.cloudflare-dns.com/dns-query
Malware and pr0n off will not work with IP's. I got it working with the URL's and cloudflared -v 2021.11. To test when setup is done: dig @127.0.0.1 -p 5053 nudity.testcategory.com (or phishing.testcategory.com). Should resolve to 0.0.0.0
Next, update the permissions for the configuration file and cloudflared binary to allow access for the cloudflared user:
sudo chown cloudflared:cloudflared /etc/default/cloudflared
sudo chown cloudflared:cloudflared /usr/local/bin/cloudflared
Then create the systemd script to control running of the service:
sudo nano /etc/systemd/system/cloudflared.servicePaste the following into it:
[Unit]
Description=cloudflared DNS over HTTPS proxy
After=syslog.target network-online.target

[Service]
Type=simple
User=cloudflared
EnvironmentFile=/etc/default/cloudflared
ExecStart=/usr/local/bin/cloudflared proxy-dns $CLOUDFLARED_OPTS
Restart=on-failure
RestartSec=10
KillMode=process

[Install]
WantedBy=multi-user.target
Enable the service to run on startup, then start the service and check its status:
sudo systemctl enable cloudflared
sudo systemctl start cloudflared
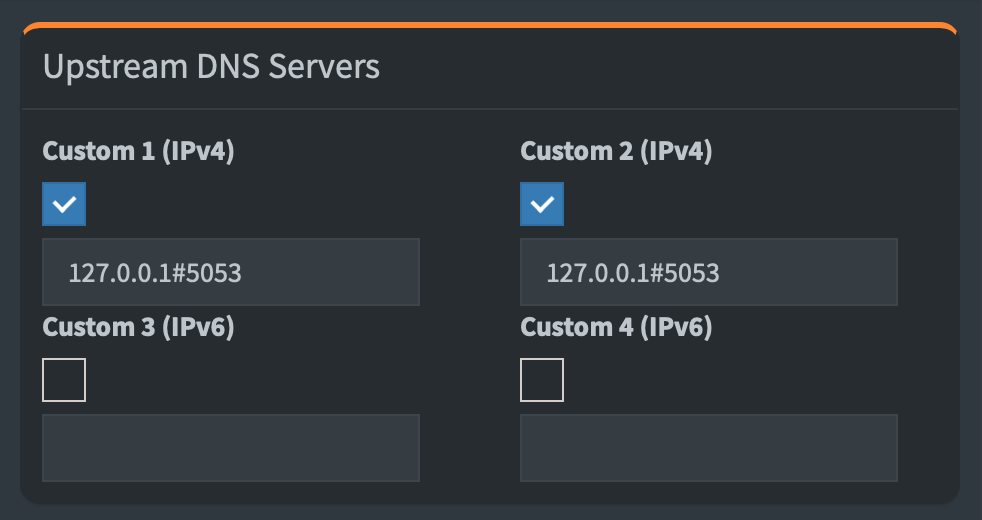
sudo systemctl status cloudflaredFinally, go to Pi-hole settings and set the upstream DNS like this:
You are all done. YAY!
And one more thing ...
Simplicity is the ultimate sophistication.
Hmm ... hmm ... I just can't get enough of my ArgonONE case ... 🤤