2021 edit: This is no longer the case since MacOS Catalina as these chimps decided to scrap the Masters photo folder, call it Originals and sort the files as their algorithms see fit.
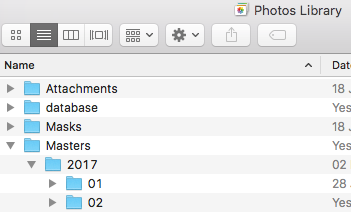
I started using Mac OS’s Photos recently. Photos is not perfect, but I like to use it as it is integrated with my photo editors and maybe the most important thing, it has a “Masters” folder where it organizes the untouched photo files in a nice manner – pretty much the same way I would manually.
I like to have a backup copy of my important files and for this I use NAS backups for pretty much everything. I used Carbon Copy Cloner in the past, but I’ve had some free time and put together a nice little solution for my backups, with rsync as backup tool and scheduling with launchd.
So let’s get on with it. We are going to backup the content of the “Masters” folder to a network share / backup location. First thing we do is define the share path and a mount point for it on your computer. I like to use my Public folder for these things.
SHARE="192.x.x.x/share/folder"
MOUNTPOINT="/Users/YourUser/Public/backup"
After this I would ping the NAS once, just to wake it up because it has power saving features and mount would fail if the NAS was sleeping when the mount command was issued – I could make it retry after a few seconds, but this is easier 😉 . You can just leave it out of the script if you don’t need it.
echo Starting backup on $(date)
ping -c 1 192.x.x.x
sleep 10
echo Mounting photo backup disk
mount_smbfs //'WORKGROUP;NasUsername:N@sPassw0rd'@$SHARE $MOUNTPOINT
The NasUsername and N@sPassw0rd gets sent as URL, so you might want to encode them properly. For this, you can use this link. Note how our N@sPassw0rd becomes N%40sPassw0rd.
OK, now we check if the share is mounted. It can happen that you are not on the network with your NAS, so there is no use for the backup to run. If it cannot mount the share, it will give you feedback and quit the script.
if mount | grep "on $MOUNTPOINT" > /dev/null; then
...
else
echo Photo backup disk cannot be mounted. Exiting.
fi
If everything is OK, then we go on with the backup:
rsync -abhP --backup-dir=_rsyncbck --delete --exclude=_rsyncbck --stats ~/Pictures/Photos\ Library.photoslibrary/Masters/ $MOUNTPOINT/
echo Unmounting photo backup disk
umount $MOUNTPOINT
echo Photo backup finished on $(date)
This is what the rsync command does: It backs up files as archive (a), it creates backup of deleted files from source (b), it makes the output human readable (h), it saves progress (P). The backup directory is defined, it’s also excluded so rsync doesn’t recreate it every time leaving you with a mess of a folder structure and –statsis added so we have a nice little log about everything rsync did. You can also add z so it uses compression and save some bandwidth (at the cost of CPU).
Below is the whole script, save it as photos_backup.sh. Of course, make adjustments to reflect your own environment.
#!/bin/bash
PATH=/usr/local/bin:/usr/bin:/bin:/usr/sbin:/sbin

SHARE="192.x.x.x/photo/Masters"
MOUNTPOINT="/Users/YourUser/Public/backup"

echo -en '\n'
echo Starting backup on $(date)
ping -c 1 192.x.x.x
sleep 10
echo -en '\n'
echo Mounting photo backup disk
mount_smbfs //'WORKGROUP;NasUsername:N%40sPassw0rd'@$SHARE $MOUNTPOINT
if mount | grep "on $MOUNTPOINT" > /dev/null; then
echo -en '\n'
echo Backing up Photos Library
rsync -abhP --backup-dir=_rsyncbck --delete --exclude=_rsyncbck --stats ~/Pictures/Photos\ Library.photoslibrary/Masters/ $MOUNTPOINT/
echo -en '\n'
echo Unmounting photo backup disk
umount $MOUNTPOINT
echo Photo backup finished on $(date)
echo =====================================================================
else
echo -en '\n'
echo Photo backup disk cannot be mounted. Exiting.
echo =====================================================================
fi
The many echo lines are there just so the log file generated looks nice 😉 Note the trailing “/” in the paths in the rsync command! With how this is set up it would sync the content of the Masters folder into a Masters folder on the NAS backup drive!
Now we set the proper permissions on the *.sh file we created. Pop Terminal, navigate to where you saved your script and:
chmod a+x photos_backup.shYou could execute this script manually and it should work fine
./photos_backup.shBut we want the script to execute automatically with launchd. First we need to create a *.plist file. Mine is set up to run every Sunday at 22:00. You can play around with the occurrence by defining other values below StartCalendarInterval. Save it as com.backup.photos.plist – adjust to your environment.
<?xml version="1.0" encoding="UTF-8"?>
<!DOCTYPE plist PUBLIC "-//Apple//DTD PLIST 1.0//EN"
 "http://www.apple.com/DTDs/PropertyList-1.0.dtd">
<plist version="1.0">
<dict>
 <key>Label</key>
 <string>com.backup.photos</string>
 <key>ProgramArguments</key>
 <array>
 <string>/Path/to/your/script/photos_backup.sh</string>
 </array>
 <key>StandardErrorPath</key>
 <string>/Path/to/your/error.log</string>
 <key>StandardOutPath</key>
 <string>/Path/to/your/success.log</string>
 <key>StartCalendarInterval</key>
 <dict>
 <key>Minute</key>
 <integer>00</integer>
 <key>Hour</key>
 <integer>22</integer>
 <key>Weekday</key>
 <integer>7</integer>
 </dict>
</dict>
</plist>
Now we move the *.plist file created to it’s proper location and we register it so it runs when defined. Open Terminal and execute:
cp ~/Path/to/your/com.backup.photos.plist ~/Library/LaunchAgents
launchctl load -w ~/Library/LaunchAgents/com.backup.photos.plist
All done! You should also get nice log files in the place you specified.
This was tested on OS X El Capitan and MacOS High Sierra but it also should work on other versions. You can modify the script to backup other things too!